Painting Process for the Ice Cream Series

I'm on a mission to make happy art that just makes people smile. But that doesn't mean it is easy! I want my art to be the best it can possibly be, not just in subject, but in technique. The art must have a near universal appeal and hopefully trigger a deep momentary happy, uplifting or nostalgic feeling. To do that most effectively, I have a very conscious process of designing my vision for the art and executing it in a way where the illusion of the reality of the art is convincing.
All of my original acrylic paintings involve a time-consuming process of applying multiple layers of translucent paint with tiny brushes, even when making giant paintings. I can't seem to find a way to speed things up too much; otherwise, I don't feel like my paintings would have the final effect that I'm looking for. So, for those who are curious, here's how I go about making one of my ice cream paintings:
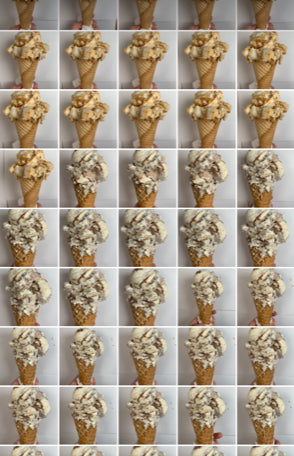
1. Getting a reference photo: Because I mostly paint food, and in particular ice cream, I almost always use a reference photo that I take myself, rather than relying on stock imagery or a traditional still life setup. I essentially start with my ice cream cone supplies, and quickly try to sculpt something with various kitchen tools that I think might look beautiful and interesting. I sometimes use natural light when photographing, but lately have found that setting up some studio lights works well, and is more controllable given factors like weather or time of day. I take probably 50 to 100 photos of each cone (using my iPhone), turning it various ways, watching for the drips, sometimes creating my own drips. And then, I do it again. I will often take photos of two to four cones of the same flavor, just sculpted in different ways (one scoop or more, different cones, different toppings, etc.), taking up to 100 or more images of each, knowing that I will probably only use one in the end.
2. After taking the photos (and cleaning up the mess!), I open all of my images, one at a time in Photoshop Elements, comparing various features of each cone, until I find the one I like best. I will sometimes combine features from a few images together, if I like drips from one cone better than another. Then I'll work on the image, adjusting various features, cropping it to fit the size panel I work on, and typically giving it a white background.
3. Once my reference image is ready, I spend a few hours drawing out a rough outline with the aid or either a projector or print outs. I actually have a bachelor's degree with a concentration in drawing, but I use the extra tools to speed things up because ultimately this is just a rough outline of major shapes and will be covered with the paint. I then import the reference image into a digital screen (like my phone, an iPad or a digital picture frame), and work from that.
4. I apply my acrylic paint in many thin layers, first roughing in the shapes with base colors, then gradually building up to more details and deeper richness. Acrylic paint tends to be a bit translucent, and I only get the opacity I want by applying multiple layers of paint. Ultimately, applying the paint in this way helps me to refine all of the complicated shapes in my paintings, overlapping my almost-invisible brushstrokes so everything looks seamless and blended, even when it isn't. Applying the paint in this way also allow for a much more dimensional look, with light passing through each layer of paint and bouncing back. Even my solid white backgrounds consist of 3 to 6 layers of paint. I work back and forth between shapes and sections, making things look more and more dimensional and sharp with each pass.

5. I work on extremely flat surfaces, typically gessoed panels, because I want as little texture to show as possible. I don't want the texture to distract from the hyper-realist quality of the painting.
6. I use small synthetic watercolor brushes, generally no more than 3/8-inch wide (except for the white backgrounds, where I use a slightly brush for parts of it). I work in short strokes, with very little paint on the brush each time, or, as I build the layers, I'll often use a rougher damaged brush to apply stipple-style layers of paint, allowing each layer to peek through. I've found this approach helps to create a greater sense of realism and appearance of texture, particularly in things like ice cream and ice cream cones, instead of trying to create smooth gradients of blended colors.
7. I use the reference photos only as guides and try to build in colors and details with my own imagination in many parts of the paintings. Thus, they aren't really photorealism, but take on a more hyper-realistic look, where the cone I paint never really existed in reality, but instead is more like a memory, where it maybe looks a little better than reality.
8. As I paint, I often turn my paintings sideways and upside-down in order to get a new perspective on how shapes and colors relate to each other. When things are right-side-up all of the time, we tend to fill in the blanks with our own minds, rationalizing the correctness of the image, or trying to make it look too much like a "thing," such as an ice cream cone. Because there is such a crazy amount of complicated detail in my ice cream paintings particularly, turning things around helps me to be more objective, remove myself from thinking of it as a thing, and instead see shape and color relationships.

9. Completion time varies depending on both the size and the complication of the subject matter. Cones with sprinkles take way longer than cones without, for example. But on average, a 16" x 12" painting will take about 40 to 50 hours of steady work, while a large work, like a 48" x 36" painting, will take 200-plus hours. My record is 300-ish hours for the 50" x 40" Sprinkles cone, 2023.
10. I don't varnish my paintings, but I do seal them with a final coat of something, often simply my acrylic medium. I want to make sure to protect the painting surface as best I can, but I am also pretty obsessive about removing any specks of dust that may settle in the painting, or sometimes I want to touch a few places up. Varnishing would interfere with my end-correction process, so I instead make sure I have a stable surface where I can create an even-looking seal but still sand out little dust specks with my folded-up sandpaper corners, then easily touch it up if necessary.
11. Patience and perseverance is key! I always remember a saying from one of my art professors: You are the only one who can hold yourself accountable for your work. So I don't let things slide as just being good enough. It has to be something I know looks right, no matter how long it takes.
I hope you've enjoyed reading this and invite you to explore more of my work and follow me on social media. I try to keep pushing the boundaries of what I paint!
Art is for Everyone
-

Ice Cream Cone Art Prints
Classic but whimsical Ice Cream Cone Art Prints, based on original acrylic...
-

Mini Ice Cream Art Prints
Every month, I send mini prints of some of my realistic ice...
-

Mini Sweet Escapes Art Prints
Mini Sweet Escapes Prints If you enjoy the new whimsical trompe l'oeil...


